


Webmail Management #
1. To manage your email via webmail, visit http://webmail.auth.gr and enter your username and password of your institutional account. Then, select Log in.

2. From the left-side menu, select Inbox to view your incoming messages. To read a message, simply click anywhere on its line. If you double-click, the message will open in a new window.

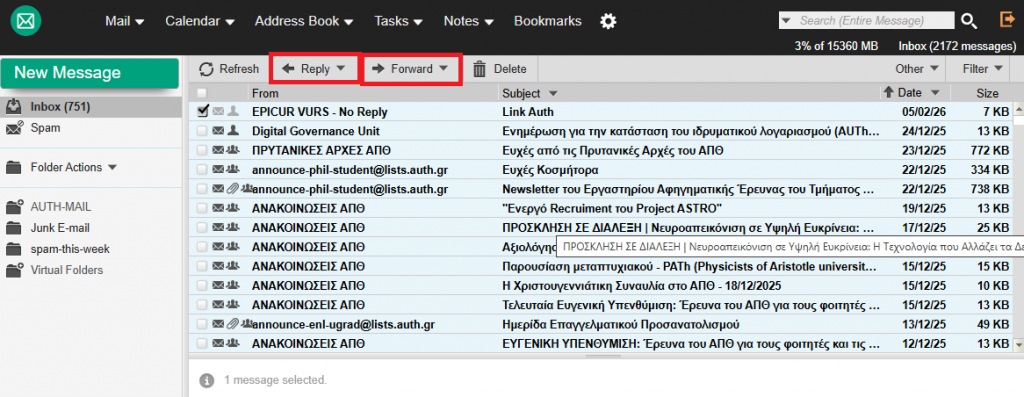
3. Select Reply or Forward to respond to or forward the message.
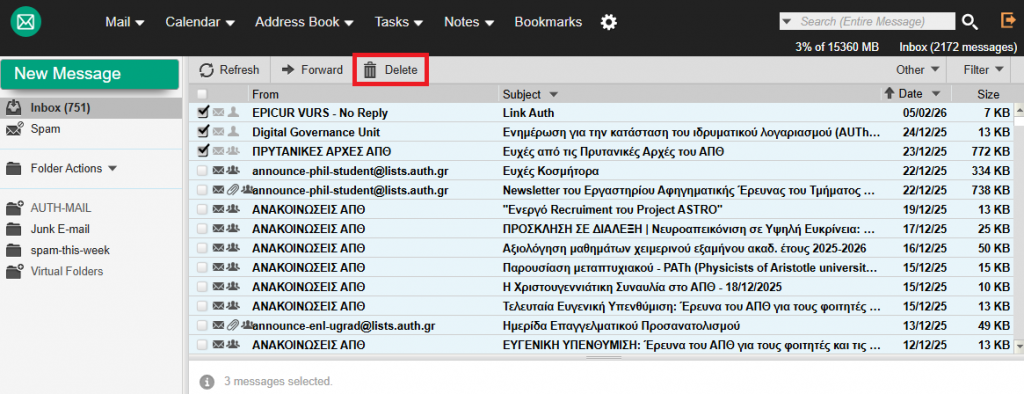
4. To delete messages, select the messages you want to remove by clicking on the corresponding check boxes on the left and click Delete.
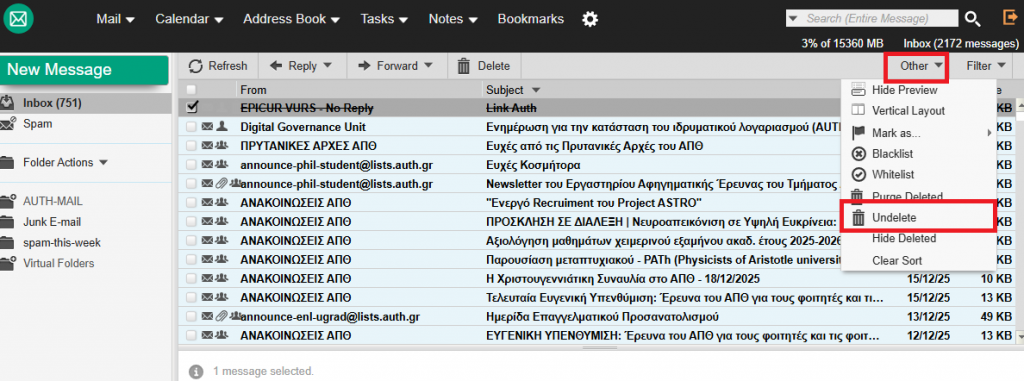
5. If you want to restore deleted messages, select the desired messages by clicking on the the corresponding check boxes on the left and click Other > Undelete.
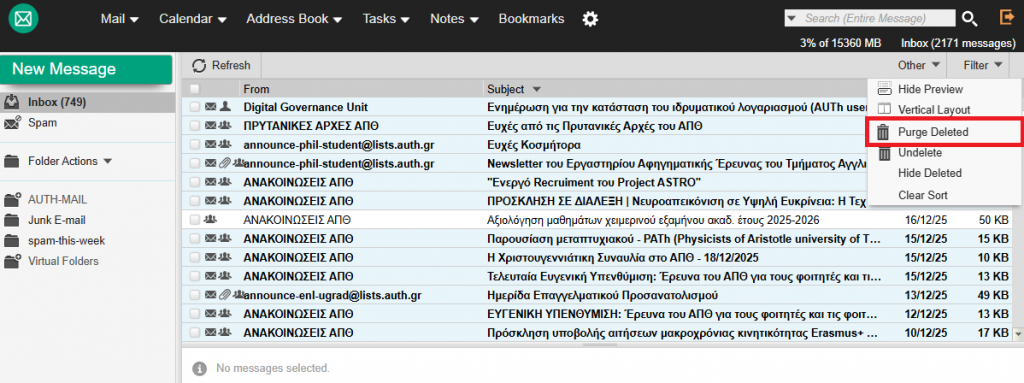
6. To permanently delete messages, go to Other > Purge Deleted.

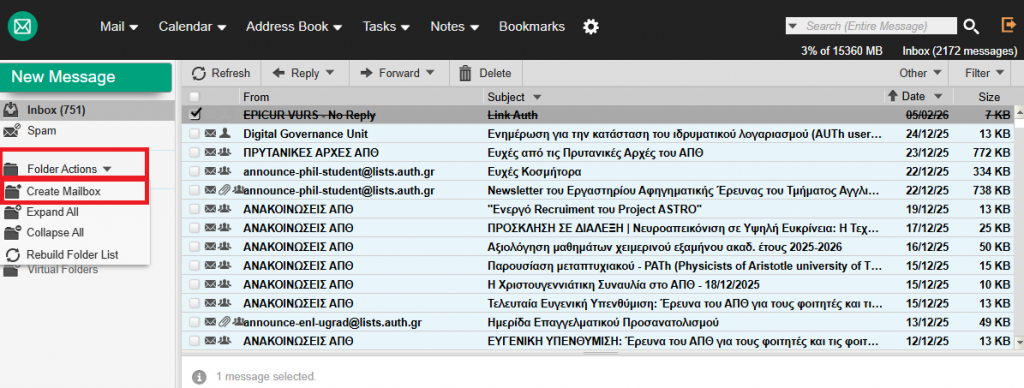
7. From the left-side menu, select Folder Actions > Create Mailbox to create a new folder.
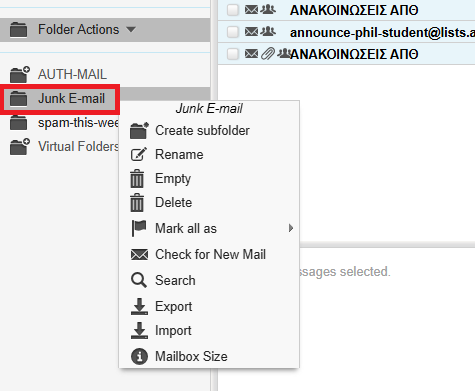
8. By right-clicking on a folder name, you can change its status. Examples of actions you can perform include:
- Subfolder / Create Subfolder → Create a subfolder within the selected folder
- Rename → Rename the folder
- Empty → Clear all messages from the folder
- Delete → Delete the folder
- Check for New Mail → Enable checking the folder for new messages and display the number of unread messages
9. To permanently delete the deleted messages of the folder you read, choose Other Actions > Purge Deleted.
10. Select Folder Actions > Expand All to display all folders and subfolders in your mailbox. For folders where Check for new mail is enabled, the number of unread messages will appear next to the folder name in parentheses.

Compose a New Message #
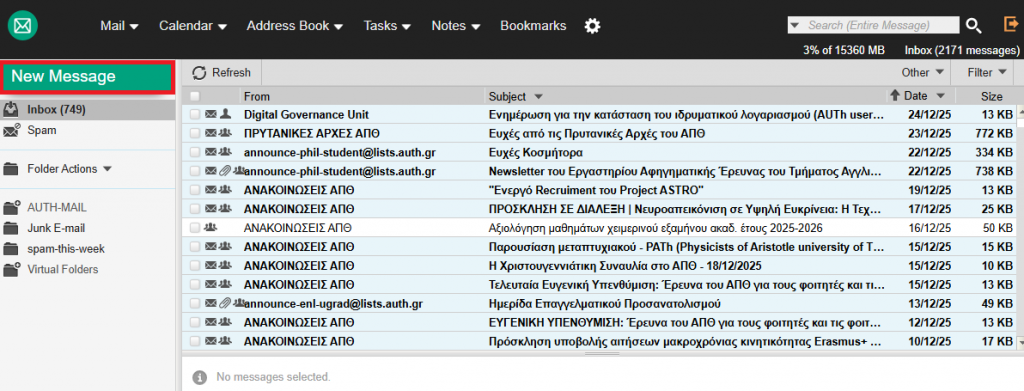
1. Select New Message from the left-side menu to compose a new message.
2. In the “To” field, enter the e-mail addresses of one or more recipients, separated by commas. If desired, you can add a carbon copy by clicking Add Cc and entering the recipient’s e-mail address. To add a blind carbon copy, click Add Bcc and enter the recipient’s e-mail address. To attach a file, select Browse to locate the file on our computer, and then click Open. Finally, click Send to send the message.

Check Spelling #
1. While composing a new message, you may check the text for spelling errors by clicking the Check Spelling icon and selecting the composition language.

2. If the spell check detects an error, the incorrect words will be highlighted in red. By clicking on each incorrect word, a menu with suggested corrections appears, from which you can choose the correct one. To return to the message, click Resume Editing

Create new Contact and Contact List #
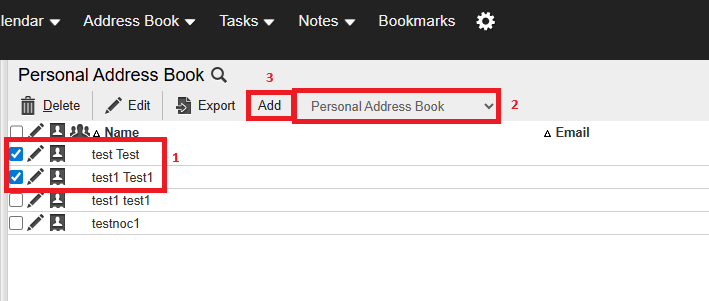
To add a contact, select Contacts > New Contact > Personal Address Book, enter the contact’s details, and click Add.

To create a Contact List and add contacts to it, follow the path Contacts > Personal Address Book. Select the contacts you want to add, choose Personal Address Book from the Contact List field, and then click Add.

Message Signature #
To add your personal signature, select Gear > Options > Mail > Personal Information. Choose the identity for which you want to add a signature, and in the “Your Signature” field, enter the text you want.

Digitally Signed Message #
1. To send a digitally signed message, first go to Gear > Preferences > Mail > S/MIME, check «Enable S/MIME functionality», and then click Import Personal Certificate.
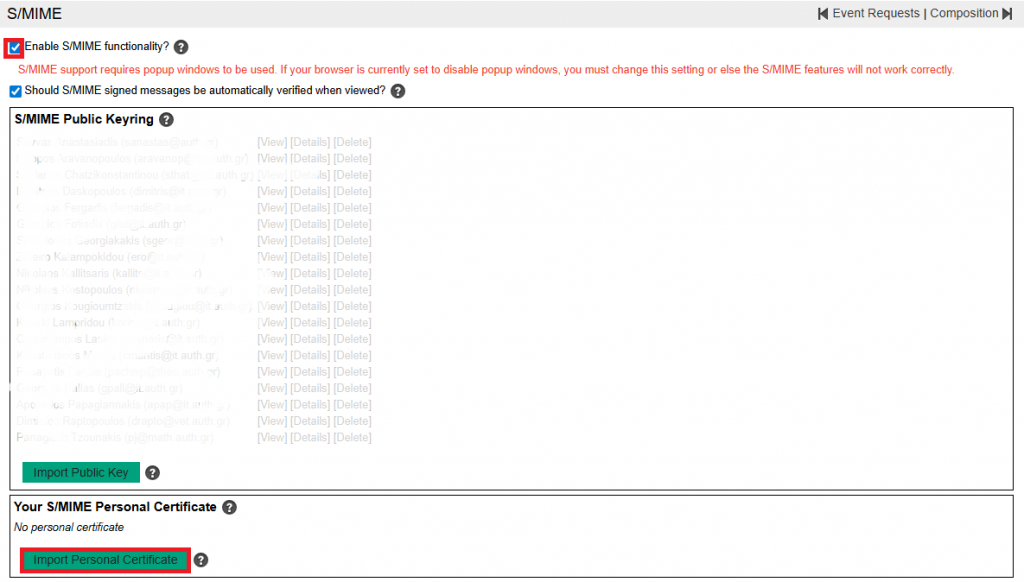
2. If you have your personal certificate in .pfx format, click Browse, select the certificate file, and click Open. In the “Password” field, enter the certificate’s protection password, and in the “Private Key Password” field, enter the password of our institutional account. Then click Import. A message saying “S/MIME public/private key pair added successfully” will appear at the bottom right. In the window you return to, click Save.

3. To send a digitally signed message, go to New Message and, in the Encryption menu, select S/MIME Encrypt Message.

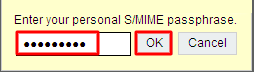
4. When you click Send Message, you will be prompted for the password of our institutional account. Enter it and click Send. This password will be requested only once per session.
Message Filters #
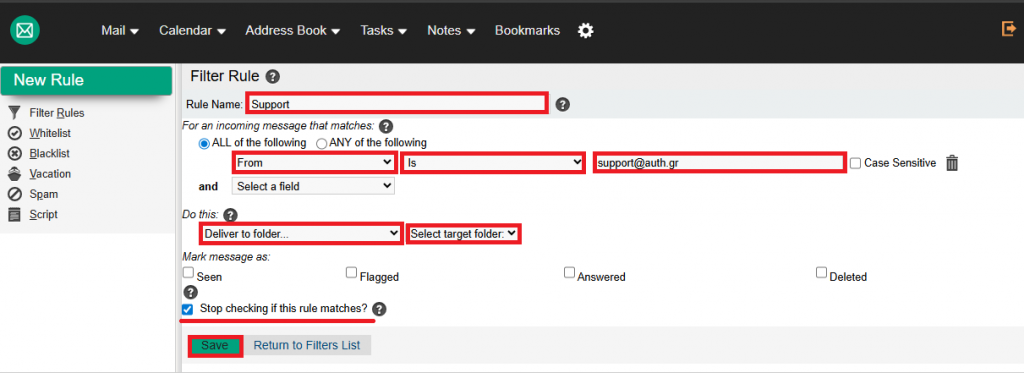
1. Go to Mail > Filters. Click New Rule in the left menu.

2. Enter a name for the filter rule, e.g., “Support”, and define how it works, e.g., From → Is → support@auth.gr, meaning when the sender is support@auth.gr. You can choose what happens to these messages; for example, to save them in a specific folder, select “Deliver to folder” and choose the desired folder. If you check “Stop checking for more rules”, once a message matches this filter, no further filters will be applied. Finally, click Save
Vacation Filter #
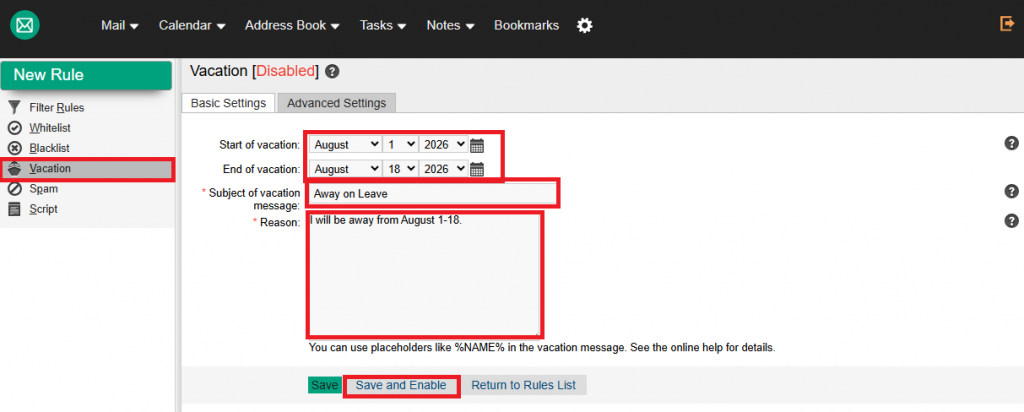
When you are away and unable to read our emails, you can enable automatic replies to anyone who sends you an email. Go to Mail > Filters. By clicking on the Vacation filter, you can edit it. After entering your preferred settings, click Save and Enable.