



Before proceeding with the following steps on Windows 11, ensure that your system is fully updated with the latest Windows Updates.
Manually add a wireless network #
Follow the steps below:
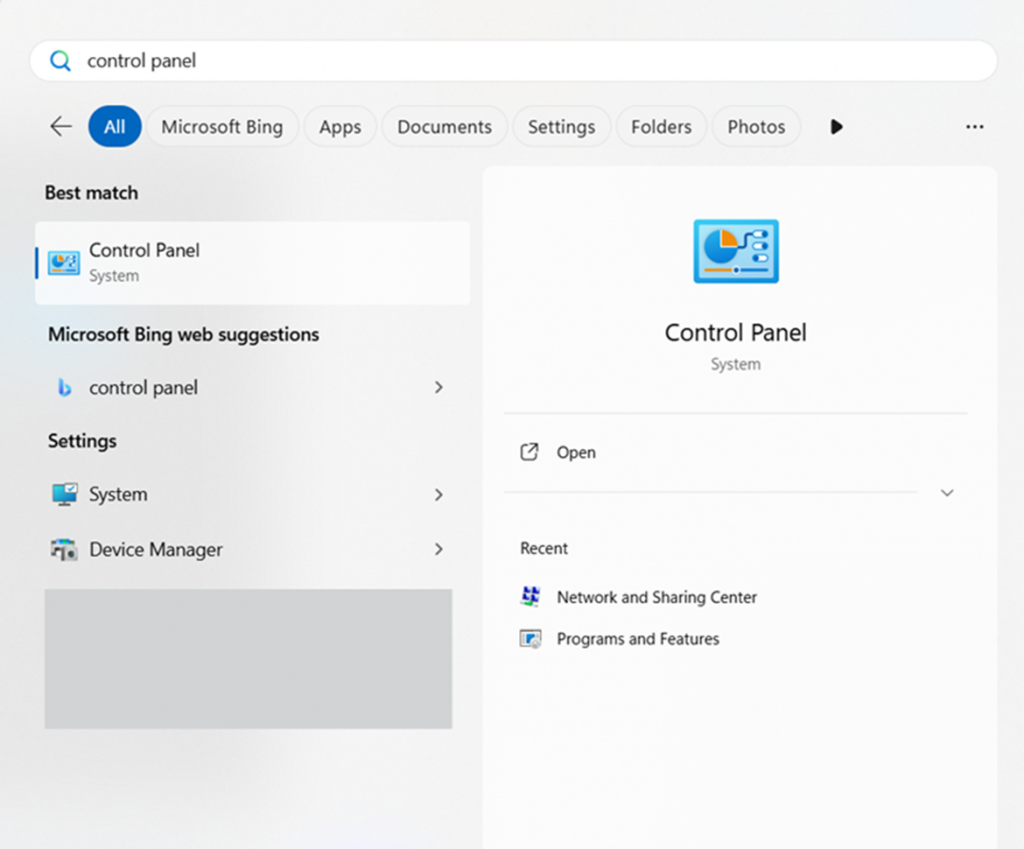
- Start Menu > Control panel
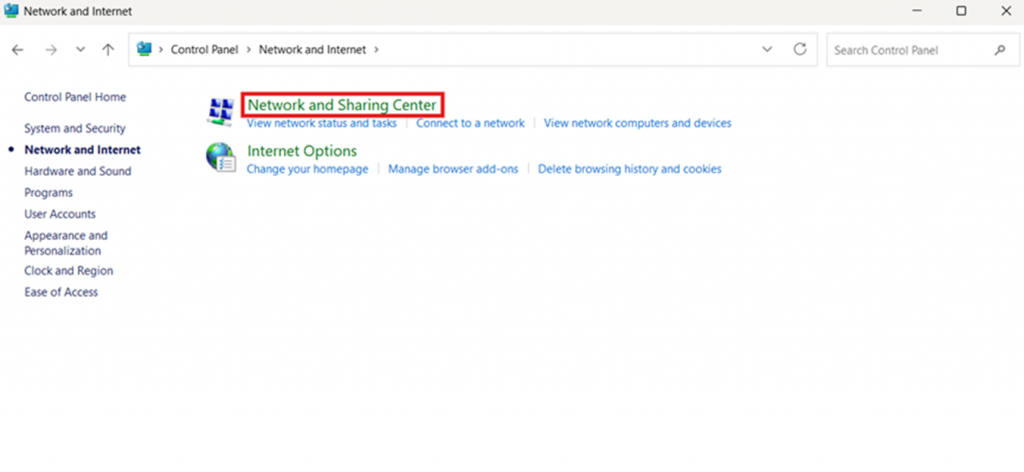
- Network and Internet

- Network and Sharing Center
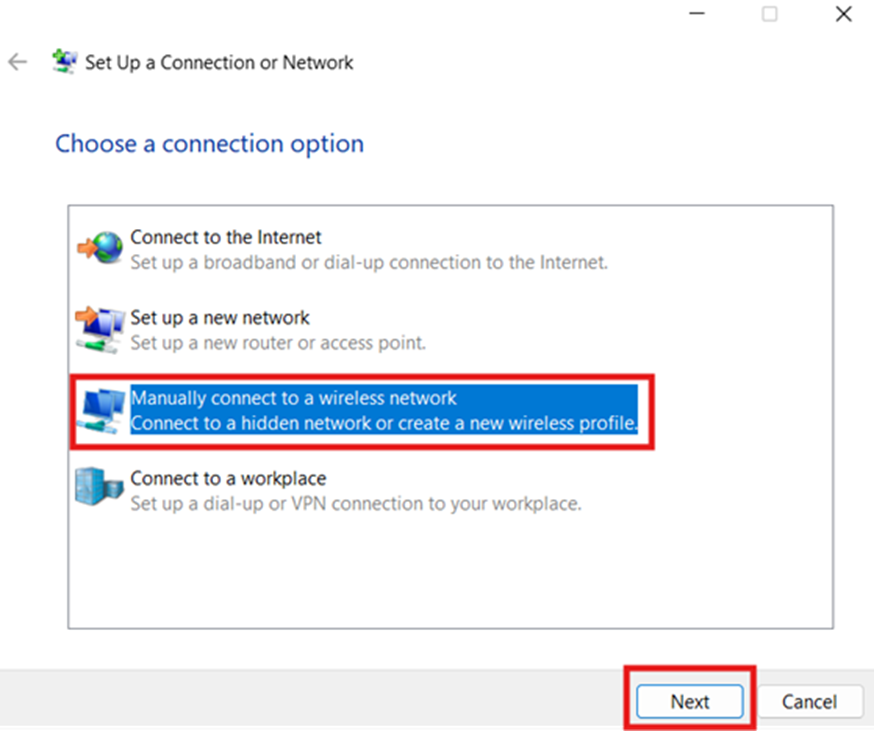
- Set up a new connection or network

- Manually connect to a wireless network > Next.
Network Name (SSID) and Security Type #
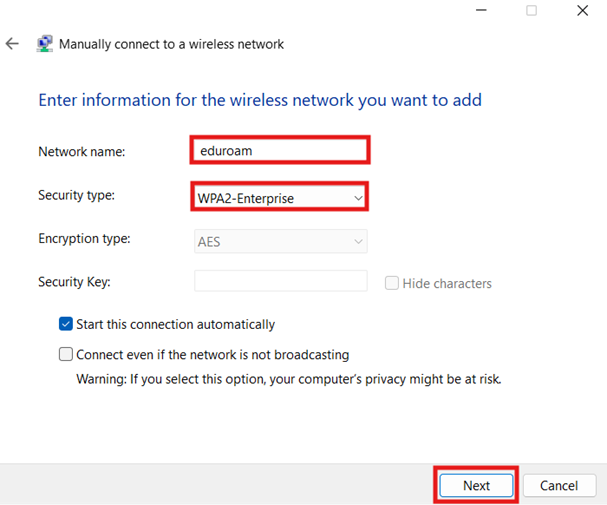
In the field Network name (SSID) type eduroam and select Network Authentication: WPA2-Enterprise.
Click Next to proceed.
Change Connection Settings #
Choose Change connection settings.

Security Tab #
In the Security tab click on Settings.

Perform the following steps in sequence:
- Check the first two checkboxes. In the text field for the second option, type: radius.it.auth.gr.
- Under Trusted Root Certification Authorities, locate and choose: HARICA TLS RSA Root CA 2021.
- In the Notifications before connecting section, select: Tell user if the server’s identity can’t be verified.
- Set the Select Authentication Method to: Secured password (EAP-MSCHAP v2) and click Configure.

In the pop-up window, uncheck the option: Automatically use my Windows logon name and password (and domain, if any) and click OK

Returning to the Security tab, click on Advanced settings. In the 802.1X settings tab enable the option: Specify authentication mode. From the drop-down menu, select: User authentication. Additionally, enable the option: Enable single sign-on for this network.
Click OK on all open windows and close all tabs.

Connecting to the Wireless Network #
Once the configuration is complete, click the Wi-Fi icon in the taskbar, select eduroam, and click Connect.

When prompted, enter your institutional user account credentials (username@domain.auth.gr and password) and click OK to establish the connection.
