



Network and Internet #
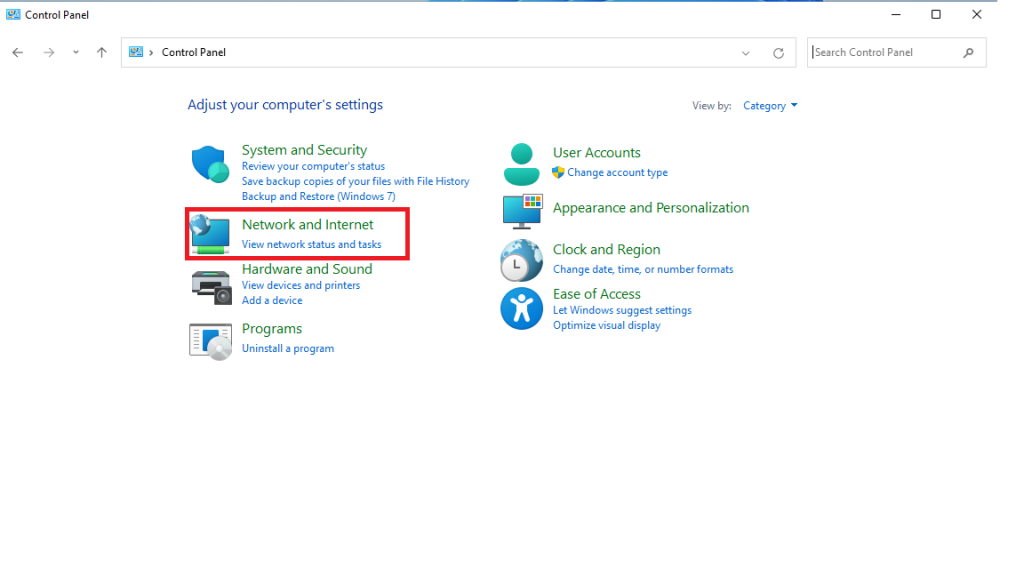
In the taskbar at the bottom of the Search field, type Control Panel. Once the Control Panel opens, choose Network and Internet.
Network and Sharing Center #
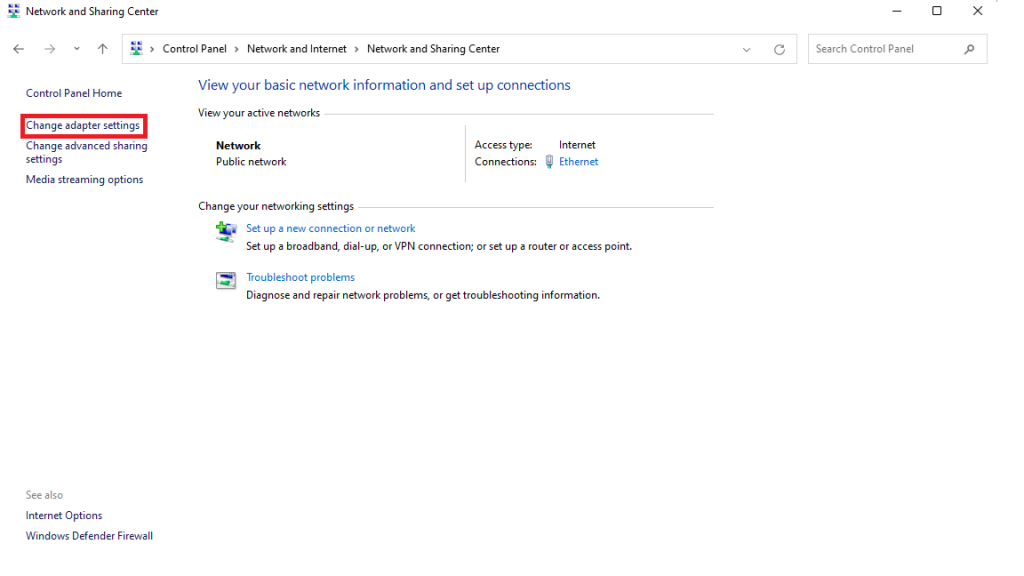
Open the Network and Sharing Center. Then, from the left side, choose Change adapter settings.
Local Area Connection #
Next, right click on the Ethernet icon and choose Properties.
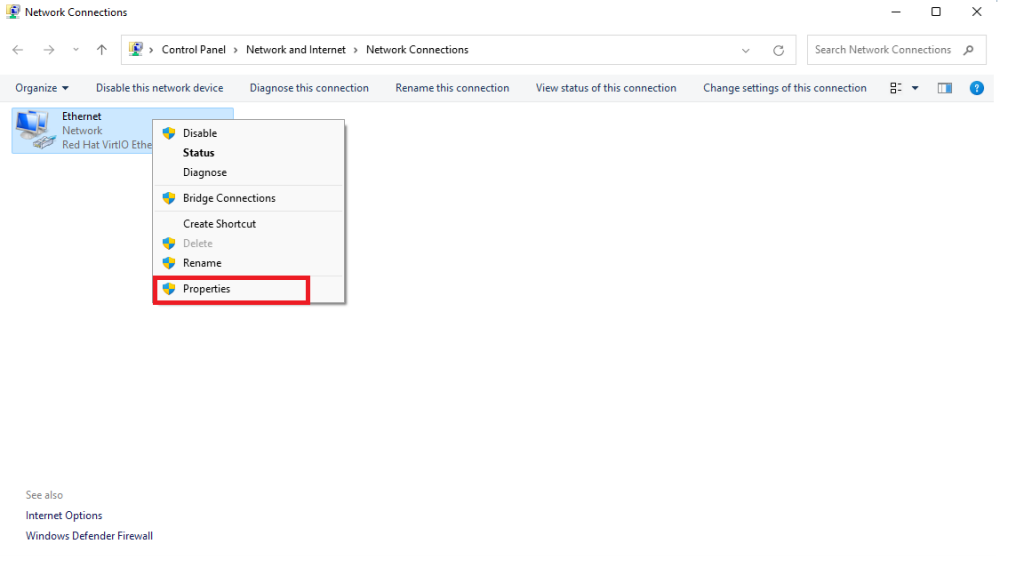
If the Ethernet icon does not exist, it means that the network card has not been installed.
Internet Protocol Version 4 (TCP/IPv4) #
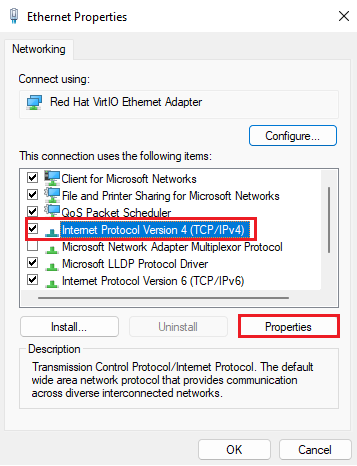
In the window that appears, under the Networking tab, choose Internet Protocol Version 4 (TCP/IPv4) and click the Properties button.
Use the following IP address #
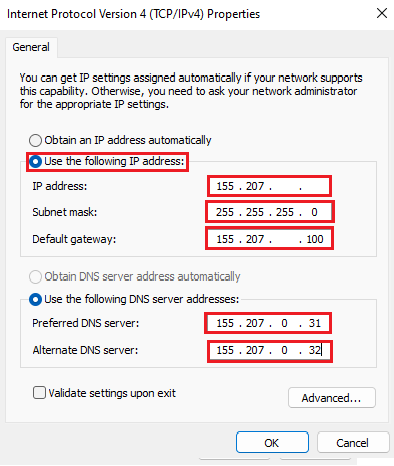
In the Properties: Internet Protocol Version 4 (TCP/IPv4) window that will appear, choose Use the following IP address. Fill in the fields with the corresponding details provided to us by the IT Center (DGU). More specifically:
| Field | Value |
| IP address | 155.207.xxx.yyy |
| Subnet Mask | 255.255.255.0 |
| Default Gateway | 155.207.xxx.100 |
| Preferred DNS Server | 155.207.0.31 |
| Alternate DNS Server | 155.207.0.32 |
where xxx is the corresponding part of the IP address and yyy are numbers from 1-254.
Completion of process #
Click OK in all open windows (starting from the last one we opened and continuing until the first one we opened).
Update of system parameters #
The system will immediately update its parameters with the new settings and connect to the local network.
Internet Access #
If the Local Connection icon in the taskbar (bottom right) shows “Internet access”, then we can connect to the internet through any browser, e.g., Internet Explorer, Mozilla Firefox.